8 Of The Best Exercises For Your Lower Abs:
-
1: Plank Row  Get into a plank position with a glider under each foot. If you don’t have gliders, you can use paper plates or towels, Stokes says. Hold the plank, press down on the gliders and slide your legs out behind you, maintaining the plank position. Your arms will extend as you slide your body back. Then, pull your body back into the starting position. Keep a straight plank pose the entire time. Make sure you’re pushing and pulling as far as you can, getting as much range as possible. Do 10 to 15 forward and backs (counting forward and back as one) or for 30 seconds.“Think of cleaning the floor and wanting to get it done as fast as possible,” Stokes says. The key is to really press down on the gliders to create friction between the glider and the floor — that’s what really gets your core engaged. If you just let them fly, you’ll only be working your hip flexors. This move works your entire rectus abdominus, Stokes notes, so you’re getting both a stretch and building strength, which is rare for core workouts.

-
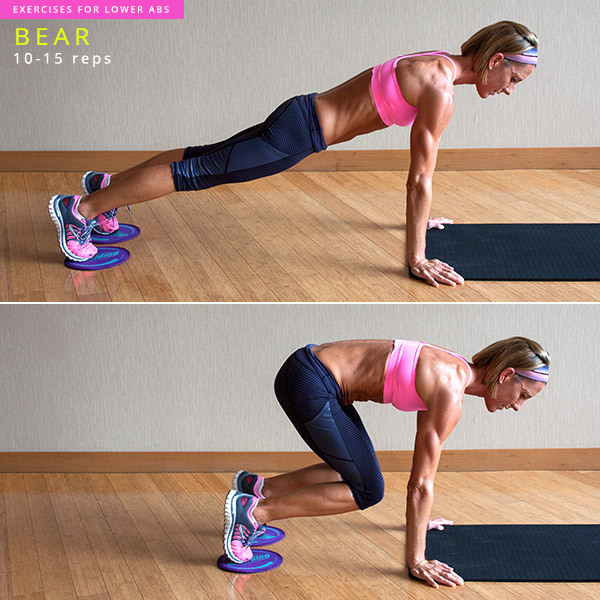
2: Bear Get into an extended arm plank, propped up on your hands with hands directly beneath your shoulders, feet hip-width apart. Press down on the gliders and slowly pull the knees in so they come about four inches in front of your hips. Then, push back to starting plank position, keeping the core tight the entire time, drawing the navel in. Continue for 30 to 45 seconds, or 10 to 15 reps. You should be moving very slowly to get the most out of each move, Stokes says.
-
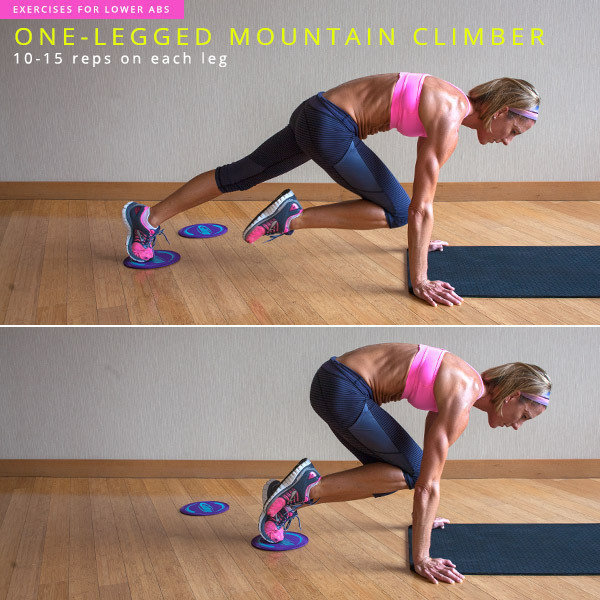
3: One-Legged Mountain Climber Start in a plank position with your right knee pulled into your chest. Keep the right knee completely stable so you have a constant contraction on that side. Then, slide the left knee in and back, maintaining the height of your hips. Do 10 to 15, then switch and do the same on the other side.In this move, your abdominal wall is contracted on one side by holding the knee in tight and the other side is more active so both sides are working. “They’re hard,” Stokes admits. “It’s more about the quality of your movement than necessarily the quantity,” so start out with fewer reps if that’s what it takes to do them correctly.
-
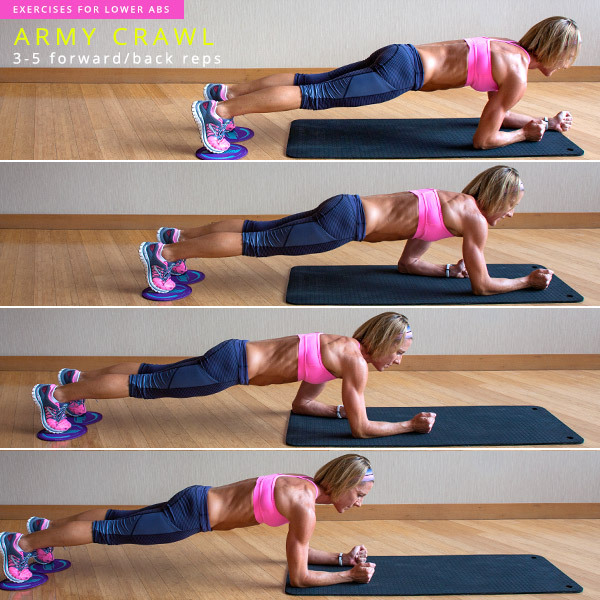
4: Army Crawl Get down into a plank position, squeezing your butt, with a glider under each foot, on the edge of your mat. Using your forearms, crawl forward about five steps, until your gliders hit the end of the mat, and then crawl back. Make sure to hold the plank position and keep legs straight and hips stable. Do this three to five times, counting forward and back as one full rep.
-
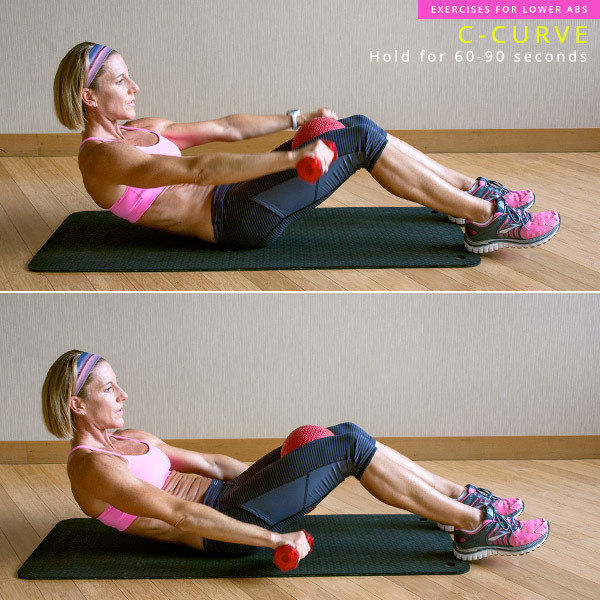
5: C-Curve This exercise is a great standard move to keep on hand that lengthens and takes pressure off the lower back, which ab workouts tend to strain. “A basic c-curve is very therapeutic after the glide work, so it makes sense to do this in conjunction with the glide work,” Stokes notes.To get into position, first sit on the floor on your tailbone, as if you are about to lower back into a sit-up position, with a ball (you can sub a T-shirt or pillow, too) squeezed tightly between your thighs. “When you hold something [here] and squeeze, you engage the inner thigh which works more through the low abdomen,” Stokes says. Rest on your elbows and make sure to maintain that height throughout. Arch your back into a small stretch, tuck the tailbone and drive the low back down. Pick your elbows up and hold onto the backs of your thighs. Keep shoulders down, chin open and elbows wide. This is the c-curve position.From here, grab a set of light weights (soup cans work, too!) and hold arms out by your knees. Lower arms and tap the ground, then lift back to start position. Repeat as you hold the c-curve for 60 to 90 seconds, concentrating on the arm movements the entire time. You can even do bicep curls instead, Stokes says. “Anything to take your mind off the fact your abs are burning.”
-
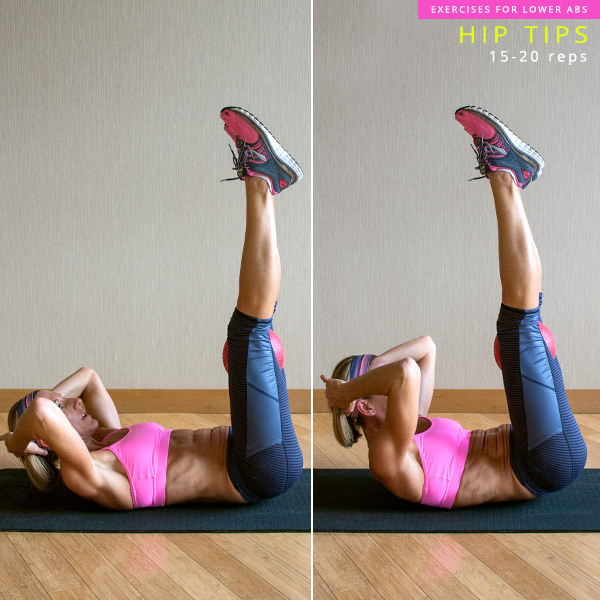
6: Hip Tips Lie flat on your back, legs straight up in the air. Place a ball between the inner thighs. As you press in on the ball, tip the hips up. It’s a subtle movement: Be careful not to rock your hips, just tip them up slightly, initiating all movement from your lower abdomen. Crunch in and tip the hips, release halfway, repeat. Progress by holding weights in your hands. Do 15 to 20 controlled reps.
-
7: X-Factor Start with your body sprawled out on the floor in an X, holding a weight in each hand. Lift your left hand and bring the weight toward your right shin, lifting your torso and keeping your belly pulled into your spine, until you roll all the way up to balancing on your tailbone. You can come up onto your elbow a bit to make it a little easier — don’t use it as a crutch, but as a guide. Lower back down and alternate sides. Try turning your foot out, still keeping the leg straight, to get a deeper inner thigh workout at the same time. Do 12 to 15 on each side.

-
8: Six Pack Scissor Lie flat on your back. With your left leg straight and about two inches off the ground, bring your right leg up toward the ceiling. Bring your hands behind your head. Lift the left foot and tap it to the right heel, crunch, then release just your shoulder blades (don’t drop your torso), and bring the leg back to its starting position a half-inch from the ground. Do 12 to 15 per side, completing all on one side before switching to the other.
